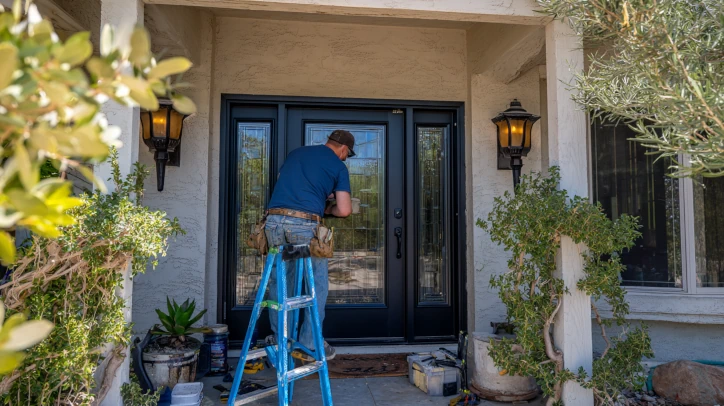
My neighbor spent three weekends trying to install entry door yourself. By Sunday evening, he called a contractor. The door was crooked, drafts whistled through gaps, and his back hurt from wrestling the 80-pound unit.
“I watched YouTube videos,” he said. “Looked easy.”
He’s not alone. Thousands search “install entry door yourself” monthly, hoping to save $500-800. Some succeed. Others pay twice—once for materials, then again for pros to fix everything.
What determines success? Your opening’s condition, your real skill level, and understanding that weatherproofing matters more than anything else.
The Hidden Complexity
More than hanging a door
When you install entry door yourself, you’re not just hanging a door. You’re removing the old unit without damaging siding or walls, inspecting for rot and structural issues, and installing proper weatherproofing.
Pull out that old door and you might discover rotted sill plates, termite damage, or openings that are 2 inches out of square. Contractors find structural problems in roughly 40% of replacements.
Weatherproofing trips up most DIYers. You need a sill pan installed correctly, flashing tape in proper sequence, and sealant in the right places while leaving drainage paths. Get this wrong and you won’t know for two years—until rot appears behind your walls.
Precision requirements
If your frame sits 1881 inch out of plumb at the top, you’ll have a 1441 inch gap at the bottom. That means drafts and energy waste.
You’re shimming at every hinge, at the strike plate, and at the deadbolt—not just corners. Testing happens repeatedly: set frame, check plumb, adjust shims, secure one screw, test door, adjust again, secure more screws, test again. This frustrates people who want to “just get it done.”
Real Cost Analysis
DIY expenses
Tool costs hit hard if you don’t own them:
-
6-foot level: $60-120
-
Cordless drill: $80-150
-
Finish nailer or rental: $200-400 ($30-50/day)
-
Oscillating tool: $50-150
-
Laser level: $40-200
Starting from zero? That’s $430-1,020 before materials.
Materials add $100-150: flashing tape, sill pan, low-expansion foam (not regular foam—critical), exterior screws, caulk, shims. Budget 10-20% extra for first-time mistakes.
Total DIY cost: $300-500 if you own tools, $730-1,520 if buying everything. Professional installation: $300-800 for standard doors.
Professional advantages
Pros complete installations in 2-5 hours, getting your home secure same-day. They bring specialized tools and know-how for problems you won’t anticipate. That out-of-square opening? They’ve seen it hundreds of times.
Professional liability matters. If you install entry door yourself and water causes $5,000 rot damage, you’re paying. Pros provide workmanship warranties (1-5 years) and their insurance covers installation errors.
Skills You Need
Technical requirements
Before deciding to install entry door yourself, honestly answer:
-
Can you shim a frame plumb within 116161 inch?
-
Can you check for frame twist and correct it?
-
Can you measure diagonals to determine square, then calculate how to compensate when it’s not ?
Shimming creates load-bearing points that transfer the door’s weight (40-100+ pounds) to solid framing. Each location needs opposing shim pairs to prevent twist.
Weatherproofing knowledge
This is where most DIYers fail. The sill pan isn’t optional—it’s required by most codes. It must slope outward (1881 inch per foot minimum) with dams up each side.
Flashing follows shingle-style layering: bottom first, sides, then top. Sealant placement is counterintuitive: seal interior to stop air infiltration, but leave exterior gaps for drainage. Completely caulking the exterior—which looks “finished”—traps water.
When DIY Makes Sense
You’re positioned well to install entry door yourself when:
-
Opening is sound (no rot, no water staining)
-
Reasonably square (diagonals within 1441 inch)
-
Standard-size prehung door
-
You own key tools
-
You have time flexibility and helpers
-
You understand building science basics
When to Hire Pros
Don’t try to install entry door yourself if you see:
-
Water staining, soft wood, or mold
-
Out-of-square openings (>1221 inch)
-
Heavy doors (solid wood >50 pounds) or complex units
-
No time for delays if weather interferes
Many manufacturers require professional installation for warranty coverage.
The compromise
Hire pros for structural installation and weatherproofing, then handle finishing yourself. This captures most DIY savings ($200-400) while protecting against high-risk installation errors.

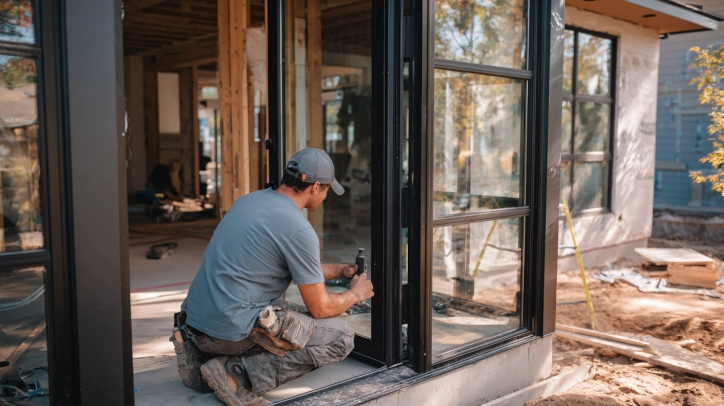
Critical DIY Steps
Preparation
-
Measure rough opening: add 2-2.5 inches beyond door frame for shimming
-
Account for flooring changes since original installation
-
Order correct configuration (left/right hand, inswing/outswing)
-
Line up helpers before delivery
Installation sequence
-
Remove old door carefully, scoring caulk first
-
Inspect opening thoroughly—press surfaces feeling for soft spots
-
Install sill pan first ($30-80, installs in minutes)
-
Set door unit, center carefully
-
Check plumb with 6-foot level in both directions
-
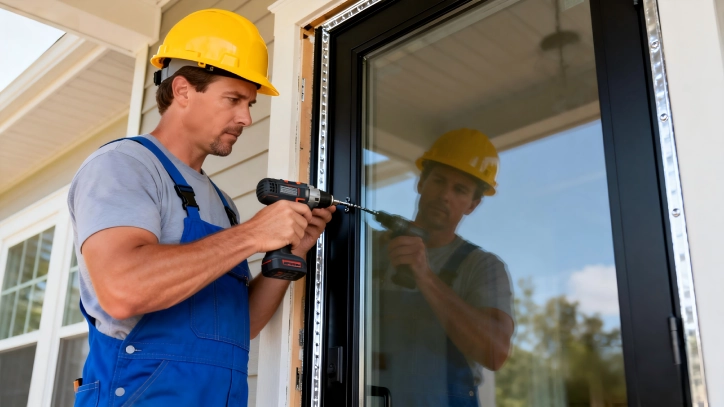
Shim at every hinge, strike plate, and deadbolt
-
Secure fasteners gradually—test after each adjustment
-
Insulate with low-expansion foam in thin layers
-
Install trim following manufacturer specs
-
Caulk strategically—seal interior, leave exterior drainage paths
Common Mistakes
Most frequent errors when you install entry door yourself:
-
Skipping sill pan (causes rot years later)
-
Over-foaming (use low-expansion door foam, not gap filler)
-
Shimming only corners (shim every critical point)
-
Wrong fastening sequence (always test before securing all screws)
-
Sealing bottom exterior (traps water—needs drainage)
-
Confusing door size with opening size (add 2-2.5 inches)
-
Ignoring existing rot (must repair before installation)
For information on measuring door frames, please refer to“How to Measure an Entry Door Opening Before Ordering?”
Making Your Decision
Calculate honestly
Add everything: door + tools you’ll buy + materials + disposal + 10-20% contingency. Compare to 2-3 professional quotes.
Factor time value: A full weekend (16-20 hours) at $25/hour = $400-500. If DIY vs pro difference is less than $400-500, professional might cost less including your time.
Know yourself
Detail-oriented or rush projects? Patient or easily frustrated? Door installation rewards meticulous attention, punishes shortcuts.
Can you safely lift 60-100 pounds while maintaining precision? Will you actually coordinate helpers or attempt solo?
Final Thoughts
The decision to install entry door yourself isn’t about proving anything. It’s about matching requirements to your situation.
DIY makes sense: Sound square opening, good tools, relevant experience, patient temperament, time flexibility. Save $400-700.
Professional makes sense: Structural concerns, limited tools, first carpentry project, tight deadline. Speed, expertise, and warranty protection justify the cost.
Hybrid approach: Pro handles structure and weatherproofing (high-risk work), you handle finishing (lower risk, substantial savings).
Prioritize quality over savings. A properly installed $500 door outperforms a poorly installed $2,000 door every time. Your entry protects your home for decades—it’s worth doing right.
Would you like to know about the styles of the entrance doors? Rutao can design and manufacture any entry door you need for your home.
FAQs
Can you install an entry door yourself?
Yes, if you have DIY skills and proper tools. Expect 8-16 hours over a weekend. You need a 6-foot level, drill, shims, and low-expansion foam. Key challenges: maintaining plumb within 116161 inch and proper weatherproofing with a sill pan. DIY works best with square openings (diagonals within 1441 inch) and no rot. Budget $300-500 with tools, or $730-1,520 buying everything.
How much does it cost to install an entry door yourself?
DIY costs $300-500 in materials if you own tools, or $730-1,520 total buying equipment (level $60-120, drill $80-150, nailer $200-400, plus door and materials). Professional installation runs $300-800, so DIY saves $200-700. However, improper installation causing water damage costs $3,000-10,000 to fix.
Do I need a sill pan to install an entry door?
Yes, absolutely. Sill pans are required by building codes and prevent water damage. They direct water back outside that gets past weatherstripping. Without one, water enters walls causing rot costing $3,000-10,000 to remediate. Pre-formed pans cost only $30-80 and install in minutes with proper slope (1881 inch per foot minimum).
When should I hire a professional instead?
Hire a pro if you see water staining, soft wood, or mold; if the opening is out of square by over 1221 inch; for heavy doors (over 50 pounds) or complex units with sidelites; or when manufacturer requires it for warranty. Professional installation costs $300-800 more but includes expertise, warranty (1-5 years), and prevents costly water damage.
What is the biggest mistake installing an entry door yourself?
Improper weatherproofing: failing to install a sill pan and sealing the bottom exterior completely. The bottom needs drainage gaps. Other errors include over-applying foam (use low-expansion type in thin layers), shimming only corners instead of every hinge and lock location, and using short screws instead of 3-inch screws reaching studs.