How to build a metal pool fence?
DIY like a pro: construct your dream metal pool barrier in 5 steps (& why our method is effortless!)
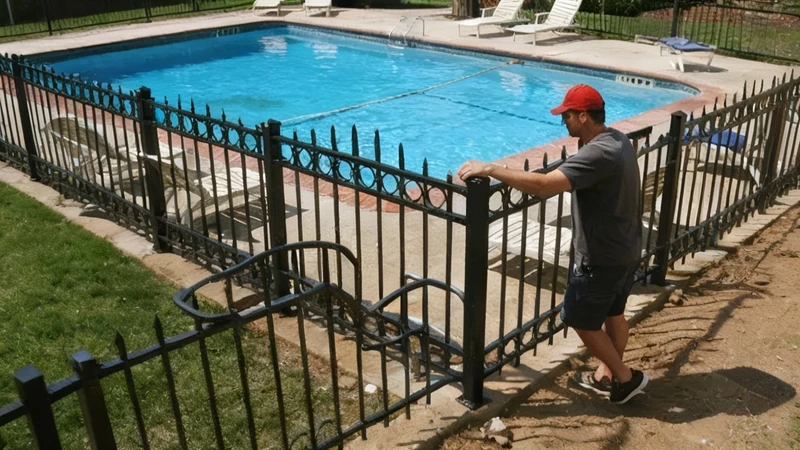
A sparkling pool is a joy of summer, but it’s also important to protect yourself. A solid, code-compliant metal pool fence isn’t simply a supplement, it’s a necessary component. While employing a contractor to build a metal pool is a choice, building your own fence is an empowering, cost-effective endeavor. When you choose the appropriate materials, such as our top-of-the-line, DIY-able fencing system, it becomes relatively straightforward. Let’s get involved!
Part one:Preparation
Before the First Post Hole: Safety and Planning the Reign Supreme
Not taking this step results in pain (or more severe problems).later. Crucial First Steps:
Describe the Local Code’s Decode: Rules are impermissible and are subject to change. Typically, you’ll need:
The minimum height is 48 inches, and typically 60 inches is required for increased safety.
Maximax Clearance at the ground: Typically 4 inches (this prevents the crawling underneath).
Vertical Bar Spacing: No wider than 4 inches (prevents the head being trapped).
Gates: must self-close and self-latch (low latch, opening outwards). Check specific details with your local building authority!
Walk your perimeter: swim in your pool. Summarize it. Included:
The placement of the Gate (the points of access that are indirect, if possible).
Slopes (steps or organized panels may be necessary).
Obstacles (devices like equipment pads, trees, and landscaping).
Part two:Why Purchase Our Metal Fence?
Why Purchase Our Metal Aluminum Fence?
Before collecting any materials, consider what causes a DIY project to succeed :
Precision Engineering: Our panels are designed to have exact tolerances, which ensures consistent spacing and easy alignment.
Durable & Low-Maintenance: High quality, aluminum powder coating that doesn’t rust, corrosion, or fade is great for years with minimal maintenance.
DIY optimized: Pre-drilled components, instructions, and matching hardware saves time on the frustration.
Safety Enthusiastic: Designed to specifically meet or exceed the major barrier codes in pools (see local specifics).
Aesthetic Variety: Select from classic black, refined bronze, sturdy white, and more to harmonize with your home’s design.
Your own DIY toolset: Acquire these essentials.
Our Base Components:
Metal Fence Panels ( aluminum is our most recommended DIY material: strong, lightweight, and rust-resistant)
Corresponding Metal Line Posts and Gate Posts
Self-closing gate kit (hinges and latches)
Installation Help:
Concrete Mix ( quick-setting is most effective)
Gravel (For posts that drain well)
Tools:
After the hole digger (Rent a power tool for soil or stone!)
Elevated (4 feet is recommended)
Tape measure andalk line
Shovel, Wheelbarrow (for soil)
Wrench Set and Drill with Metal Bits
Safety Gear (Glasses, Gloves)
Part three:The 5-Step Approach
The 5-Step Approach: Your Way to a More Safe pool.
Step 1: Sign Your Territory
Use markers and string to define the exact fence route.
Posts that are situated within your panel’s width (e.g., every 72″ center-to-center for 72″ panels).
Pro Tip: Use a chalk line that is snapped onto the ground to provide a straight path for laser alignment. Check twice the measurements!
Step 2: Dig Post Holes – The Base of Power
Depth is KING: Dig at least 24-30 inches deep (deeper in areas that are prone to frost). The width should be 3 times the diameter of the post.
Call 811 immediately! This free service finds subterranean utilities that are crucial to safety.
Tip: 2-3 inches of stone should be added to the bottom of the hole for drainage. This prevents water from pooling and forming ice.
Step 3: Establishing Posts in Concrete – Accurate Matters
Insert the poster into the gap, centered. Use temporary 2×4 supports to maintain its position perfectly vertical in both directions. Constantly evaluate your abilities!
Combine the concrete according to the instructions (try to achieve a “thick oatmeal-like” consistency). Pour the concrete into the gap, leaving 3 inches of concrete below the grade for fill dirt.
DO_NOT DISTURB: Allow the concrete to cure completely (24-48 hours is the minimum amount of time, see the bag’s instructions). This is of great importance for the stability. Our posts include simple-to-use brackets that facilitate the attachment of panels later on.
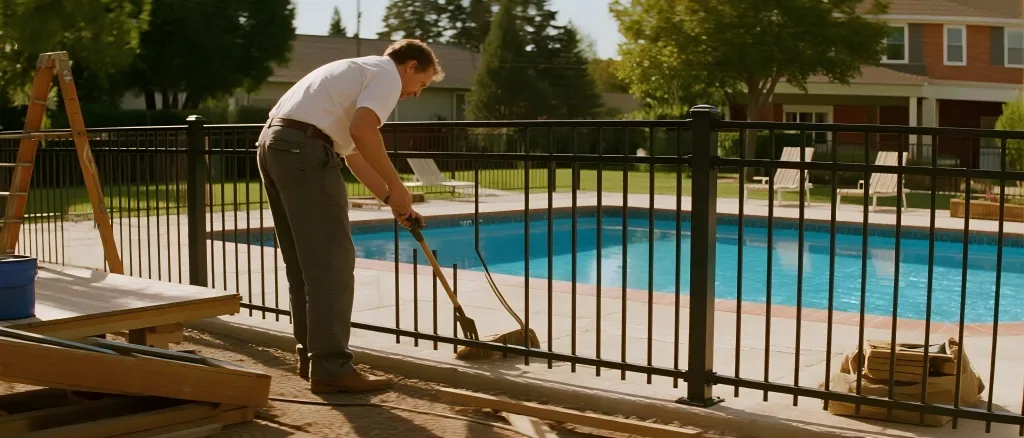
Step 4: Attach the Panels and Gates – Preserve the perimeter.
Brackets: First, attach the bracket system you purchased with your cured posts at the correct height (typically the top or bottom of the panel, or the middle).
Lift and secure: Place your first panel into the brackets with care. Get a companion! Our lightweight aluminum panels facilitate this process more than the steel does. Safe with bolts – begin with a firm grasp.
Align & Level: Utilize your string line and level to ensure the panel is perpendicular and at the proper height before fully screwing in all bolts. Repeat for additional panels.
Gate installation steps: Complete the installation of the gate frame (if necessary) on a flat surface. Close the hinges on the gate’s post according to the instructions of our kit. Hang the gate’s flaps, making sure they swing easily and cover the ground by 1-2 inches. Establish at least 54 inches of elevation above the ground. TEST GATE’s functionality without relent! It must seal and latch consistently from any position.
Step 5: Final Inspection and Enjoyment
Walk the Line: Ensure every email is genuine. Examine every bond between panels. Attempt to repeatedly activate the gate’s latch. Ensure that no spaces are smaller than 4 inches.
Backfill & Beautify: Cover the bases of posts with soil or decorative stone/rock. Think about adding lighting that would be appropriate for the landscape during the evening and to increase safety.
Maintenance Ease: Our aluminum powder is coated with a layer of water-resistant synthetic material that only needs to be occasionally scrubbed with a garden hose, this frees up your summer for fun in the pool, not cleaning it!
Part four:Conclusion
Create safety and trust with our fence.
Creating your own metal pool’s fence is a fulfilling project that offers peace of mind and saves a lot of money. By taking part in our premium, customizable aluminum pool fence system, you’re not only purchasing materials, but also participating in an investment:
Unshakable Safety: Designed to preserve what is most important.
Easy Installation: Precision-driven design reduces time and disappointment.
Lasting Beauty and Value: Maintaining coatings that are durable against the sun, chlorine, and weather.
Reducedcompliance: Engineered to achieve essential safety goals.
Are you prepared to create your Safer Oasis?
Cease the stress associated with pool safety and begin to build faith! Browse our diverse selection of code-compliant, DIY-oriented aluminum pool fence components, gates, and complete assemblies today.
Get Your FREE Project Quote and Design Consultation! Visit [Your Website] or call us at [Your Contact Number]. Our experts are here to assist you in choosing the appropriate fence and ensure that your own project is a total triumph.
Construct it correctly. Create it with safety in mind. Concentrate on it – we will help you. Your more secure, more attractive backyard is now underway.
