I’ll be honest—there’s nothing worse than watching a $2,000 door get delivered only to find out it won’t fit. I’ve seen it happen, and it’s painful. The thing is, measuring an entry door opening isn’t rocket science, but it does require some attention to detail. Miss a measurement by half an inch? You might be stuck with a door you can’t use.
Let’s walk through exactly how to measure an entry door opening so you get it right the first time.
Why Getting This Right Actually Matters
Here’s the deal: door manufacturers work with standard sizes. If your measurements are off, you’re either paying 30-50% more for a custom door or you’re dealing with expensive frame modifications. And trust me, modifying the frame after the door arrives can easily cost you $300-$800 extra.
But it’s not just about money. A poorly fitted door means:
Air leaks that’ll jack up your heating bills by 25% or more
Security gaps that defeat the whole point of a solid entry door
A door that sticks, binds, or just doesn’t close properly
Restocking fees that’ll eat 15-20% of what you paid (plus return shipping)
Yeah, it’s worth spending 30 minutes to measure carefully.
What You'll Actually Need
Don’t skimp on tools here. A cheap fabric tape measure will stretch over time and give you bad readings. Here’s what works:
Steel tape measure (at least 25 feet)—fabric ones lie to you
4-foot carpenter’s level—those little levels aren’t accurate enough for doors
Notepad and pencil—sketch the opening and write down every measurement
Flashlight—you’d be surprised what’s hiding in dark corners
A helper—seriously, this isn’t a one-person job if you want accuracy
If you’re doing multiple doors, consider grabbing a laser measuring tool. They’re worth it and eliminate the sagging tape problem entirely.
Pro tip: Take photos with your tape measure visible in the frame. You’ll thank yourself later when you’re at the hardware store and can’t remember if that measurement was 35 7/8 or 36 1/8.

Door Talk: Know These Terms Before You Order
When you call a door supplier, they’re going to use specific lingo. Understanding it prevents expensive miscommunication.
Rough Opening
This is the space between your bare wall studs—before any trim or frames go in. You’ll measure this if you’re replacing the whole unit (door plus frame) or building new. Rough openings are usually about 2 inches wider and 2.5 inches taller than the actual door to allow room for the frame and shimming.
Check that your studs are actually vertical (plumb) and that there’s no rotted wood down near the bottom. Water damage loves hiding there.
Finished Opening
Measure here if you’re only swapping out the door itself while keeping the existing frame. This is the space between the jambs—the vertical pieces that make up your doorframe. It’s always smaller than the rough opening because, well, the jamb takes up space.
Before you commit to reusing that frame, really inspect it. Rotted or warped jambs mean you need to replace everything, not just the door.
Jamb Depth
This one trips people up constantly. Jamb depth = how thick your wall is from inside to outside. It includes your interior drywall (usually 1/2 inch), the studs (3.5 inches for 2×4 walls, 5.5 inches for 2×6), exterior sheathing, and whatever siding you’ve got.
Standard sizes are 4 9/16 inches or 6 9/16 inches. Anything else? You’re ordering custom or adjustable jambs.
How to Measure Entry Door Width
Here’s where people mess up: they measure once at eye level and call it done. Don’t do that. Openings settle, warp, and shift—especially in older homes.
Measure at the top—keep your tape perfectly horizontal
Measure at 36 inches up (where your lockset goes)
Measure at the bottom near where the threshold sits
Write down all three numbers
Use the smallest measurement when ordering
Why the smallest? Because your door has to fit through the narrowest point. If the top is 36 1/4 inches but the bottom is 36 inches, you’re ordering a 36-inch door (or smaller).
And for the love of your sanity—make sure that tape is taut and level. A sagging tape can add a quarter inch to your measurement, which is the difference between “fits perfectly” and “doesn’t fit at all.”
If you’re seeing more than a 1/2 inch variation between your three measurements, your opening is seriously out of square. That’s a bigger problem we’ll address in a minute.
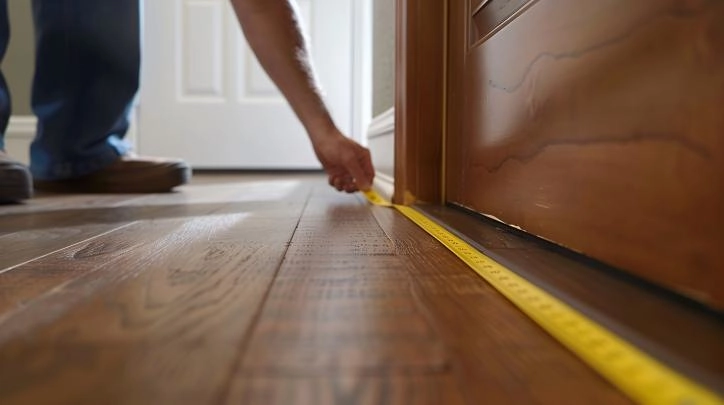
Measuring Height (Don't Forget About Floors)
The most common height mistake? Forgetting about flooring thickness. If you measure from subfloor but plan to install tile later, your door won’t open over that tile. Ask me how I know.
Measure from the actual floor surface (or subfloor if there’s no floor yet)
Take measurements on the left, center, and right sides
Floors aren’t level—use the smallest number
Note whether you measured from subfloor or finished floor—write this down in all caps
If measuring from subfloor and adding flooring later, add 1/2 to 3/4 inch to your calculation
Standard residential doors are 80 inches tall (that’s 6’8″). You’ll see 96-inch doors in modern homes with high ceilings, but 80 inches is still the norm.
One more thing: if you’re tearing out old flooring, measure from subfloor. If you’re keeping what’s there, measure from the current surface—but check with your level to see how far off things are.
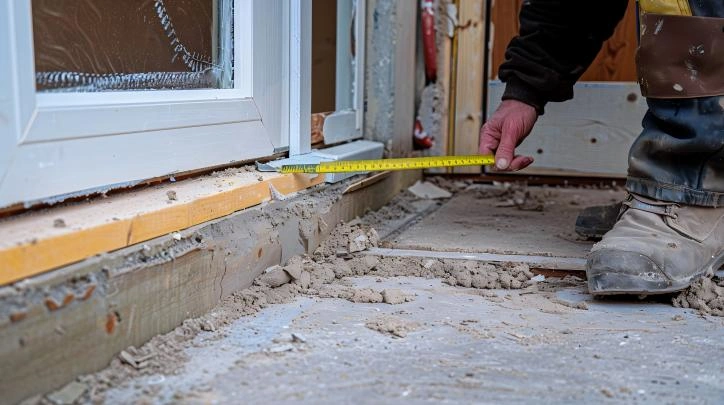
Wall Thickness and Jamb Depth (Yes, They Matter)
I’ve watched people order doors without measuring wall thickness. The door arrives, and the jamb is either way too shallow or sticking out past the wall. It’s awkward.
Here’s how to actually measure this:
Pull off a piece of interior trim if you need to see the layers
Measure from the interior wall surface straight through to the exterior surface
Count every layer: drywall + studs + sheathing + siding
Watch for extras like foam insulation boards or stacked materials
If your measurement is within 1/4 inch of a standard size (4 9/16″ or 6 9/16″), you’re fine—use that standard size. Off by more than 1/2 inch? You need custom jambs.
For brick or stone homes, measure to where the jamb will actually terminate. These installations are trickier, so consider getting a pro involved.
Check If Your Opening Is Actually Square
Most openings aren’t perfectly square—especially in houses built before 1980. But you need to know how far off you are because it affects everything.
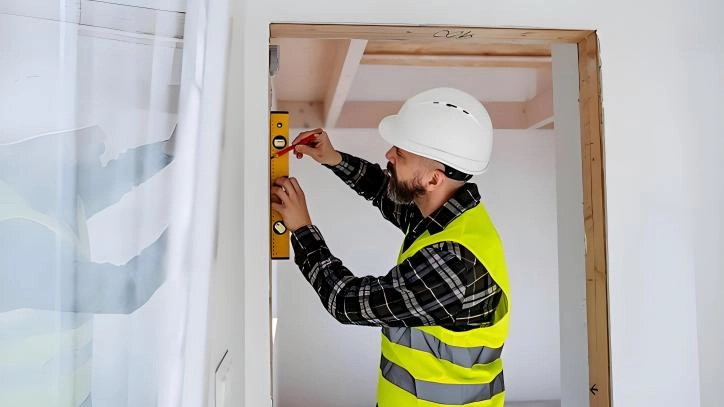
Is It Plumb? (Vertically Straight)
Put your level against each side jamb. The bubble should sit dead center. If it doesn’t, measure the gap between the level and the jamb at both the top and bottom.
Out of plumb by 1/4 inch? That’s fixable with shims during installation. More than 1/2 inch? You’ve got foundation issues that need addressing before you install any door.
A door in an out-of-plumb opening will swing open or closed on its own. It’s annoying and ruins your hardware fast.
Is It Square? (The Diagonal Test)
This one’s simple but crucial:
Measure corner-to-corner diagonally (top-left to bottom-right)
Measure the other diagonal (top-right to bottom-left)
Compare the two numbers
If they match, you’re square. Difference of 1/4 inch or less? Workable. More than 1/2 inch? That opening needs reconstruction before you order anything.
An out-of-square opening causes gaps, prevents proper latching, and makes your door look crooked even when it’s installed correctly.
Figure Out Your Swing Direction (This Is Critical)
Wrong swing direction = non-returnable expensive mistake. I cannot stress this enough. Manufacturers won’t take these back because it’s considered your error, not theirs.
Which Way Do the Hinges Go?
Stand outside your door—like you’re about to walk in from the exterior. Look at the opening from this position.
Hinges on your right = right-hand door
Hinges on your left = left-hand door
Some companies say “active right” or “reverse swing,” so clarify their terminology before ordering. When in doubt, take a photo of your current door from outside with it open, then show that photo to your supplier.
Inswing or Outswing?
Inswing: Door opens into your house (most common for residential)
Outswing: Door opens toward the outside (common for storm doors and hurricane zones)
Why does this matter? Security, mainly. Inswing doors hide the hinges inside where they can’t be tampered with. But outswing doors perform better in high-wind situations.
You’ve got four possible combinations: right-hand inswing, left-hand inswing, right-hand outswing, left-hand outswing. Get this wrong and you’re eating the cost of that door.
Other Measurements That'll Save You Headaches
Beyond the basics, grab these measurements too:
Width and depth of existing exterior trim (if you want the new door to match)
Distance from the door to nearby walls—you need at least 18 inches on the latch side for full swing
Height of your current threshold
The actual swing arc space (will the door hit furniture, baseboards, or light switches?)
Any overhead stuff like low-hanging light fixtures
I once saw someone order a door that hit the baseboard heater every time it opened. Don’t be that person—map out the swing arc before ordering.
Document Everything (Your Future Self Will Thank You)
Take photos. Lots of them. From multiple angles. Include:
Straight-on shots of the full opening
45-degree angles from both sides
Close-ups of any damage, rot, or weird stuff
Your existing hardware
The tape measure in the frame showing dimensions
Surrounding areas (nearby walls, furniture, switches)
Store these in a dedicated folder on your phone with the date. When you’re standing in the showroom or talking to a contractor, these photos are gold. Professionals can spot issues in photos that you might’ve missed.
Double-Check Everything Before You Click "Order"
Take 10 minutes to review systematically:
Do your measurements match the manufacturer’s specs?
Did you select the correct swing direction? (Visualize it opening—does it match your selection?)
Does jamb depth match your wall thickness (within 1/4 inch)?
Did you specify rough or finished opening?
Does the door meet local building codes for energy ratings?
Have someone else look at your numbers. Fresh eyes catch errors. If anything seems questionable, go remeasure. That 30 minutes could save you $1,000+ in returns and delays.
Mistakes That Cost People Money (Learn From Them)
These are the top ordering errors I see repeatedly:
Measuring only once—openings aren’t uniform; always take three measurements
Ignoring flooring thickness—measure from subfloor? Add your flooring height
Mixing up rough vs. finished opening—these differ by several inches
Reversing swing direction—always stand outside to determine handing
Skipping jamb depth—this makes installation impossible
Not checking for square—out-of-square openings cause operational nightmares
Forgetting swing clearance—a door that hits stuff doesn’t work
One more: never assume you’ve got a “standard” size without measuring. Even 36×80 doors (the most common) aren’t universal. Old houses have weird dimensions. Measure. Always.
For relevant knowledge on measuring or installing doors, you can refer to https://www.thermatru.com/project-center/product-installation/
FAQs
What's the standard size for an entry door?
Most residential entry doors measure 36 inches wide by 80 inches tall, though you’ll also find 32-inch and 30-inch widths in common use. Jamb depth typically runs either 4 9/16 inches or 6 9/16 inches depending on whether you’ve got 2×4 or 2×6 wall framing. That said, never assume your opening matches these standards—older homes especially tend to have non-standard dimensions, so always measure rather than ordering based on “typical” sizes.
Do I measure the door itself or the opening?
Always measure the opening, never the existing door. If you’re replacing the entire unit (door plus frame), measure the rough opening between the wall studs. If you’re only swapping the door slab and keeping the frame, measure the finished opening between the jambs. The door itself will be manufactured slightly smaller than the opening to allow for proper fit, operation, and weathersealing.
How do I tell if my door is right-hand or left-hand?
Stand outside facing the doorway—position yourself where you’d stand when entering from the exterior. Look at which side the hinges are on when the door swings away from you. Hinges on your right? That’s a right-hand door. Hinges on your left? Left-hand door. Also specify inswing (opens into the house) or outswing (opens outward). This is the most common ordering mistake, so take a photo of your current setup if you’re unsure.
Why measure at three different spots instead of just one?
Houses settle and shift over time, which means your opening might be wider at the top than the bottom—or vice versa. Measuring at three points (top, middle, bottom) reveals these irregularities so you can order based on the narrowest measurement. If you measure only once and hit the widest point, your door won’t fit through the narrower section. This is especially important in homes built before 1980.
What exactly is jamb depth and why should I care?
Jamb depth is how thick your wall measures from the interior surface all the way through to the exterior. It includes your drywall, studs, sheathing, and siding—every layer that makes up your wall. Standard residential jamb depths are 4 9/16 inches or 6 9/16 inches. Order a door with the wrong jamb depth and it won’t sit flush with your walls, creating gaps where you can’t properly attach trim and compromising both appearance and weathersealing.
Should I measure from the floor or from the subfloor?
Measure from whatever will be your actual finished floor surface. If flooring is already installed, measure from that. If you’re measuring before installing tile, hardwood, or other flooring, measure from the subfloor but note this clearly when ordering—you’ll need to account for flooring thickness later. Forgetting to add flooring thickness is one of the most common measurement mistakes and results in doors that won’t open properly.
What tools do I actually need for measuring a door opening?
At minimum, you need a steel tape measure (25 feet or longer), a carpenter’s level (4-foot preferred for accuracy), and something to record measurements. A flashlight helps you inspect the frame for damage or rot, and having a second person dramatically improves measurement accuracy. Steel tape measures are critical—fabric ones stretch over time and give inaccurate readings. If you’re measuring multiple openings, consider investing in a laser measuring tool for added precision.
How can I tell if my door opening is square?
Run two diagonal measurements: top-left corner to bottom-right, then top-right to bottom-left. If both measurements match, your opening is square. A difference of 1/4 inch or less is acceptable and can be corrected with shims during installation. Differences exceeding 1/2 inch indicate the opening needs reconstruction. Also use your level to check that both side jambs are plumb (perfectly vertical) and the header is level. Out-of-square openings cause doors to bind, fail to latch, and wear out hardware prematurely.
Can I still install a door if the opening isn't square?
Yes, but you’ll need to correct the irregularity with shims during installation. Slightly out-of-square openings (1/4 to 1/2 inch difference in diagonals) are common and workable—installers use shims to align the frame properly. Severely out-of-square openings (more than 1 inch) suggest structural problems that should be evaluated and potentially repaired before installing a new door. An experienced installer can work with moderate irregularities, but extreme cases require frame reconstruction.
What's the difference between rough opening and finished opening?
A rough opening is the unfinished space between bare wall studs before any jambs or trim are installed—this is what you measure in new construction or full-unit replacement. A finished opening measures between the existing door jambs where the door slab actually sits, used when replacing just the door while keeping the frame. These measurements differ by several inches (the jamb thickness on each side), so confusing the two causes major sizing problems. Always specify which type you’re providing when ordering.